Setting up a StarRupture Dedicated Server (Experimental feature) using the Steam App
Step 1 - Installing server files
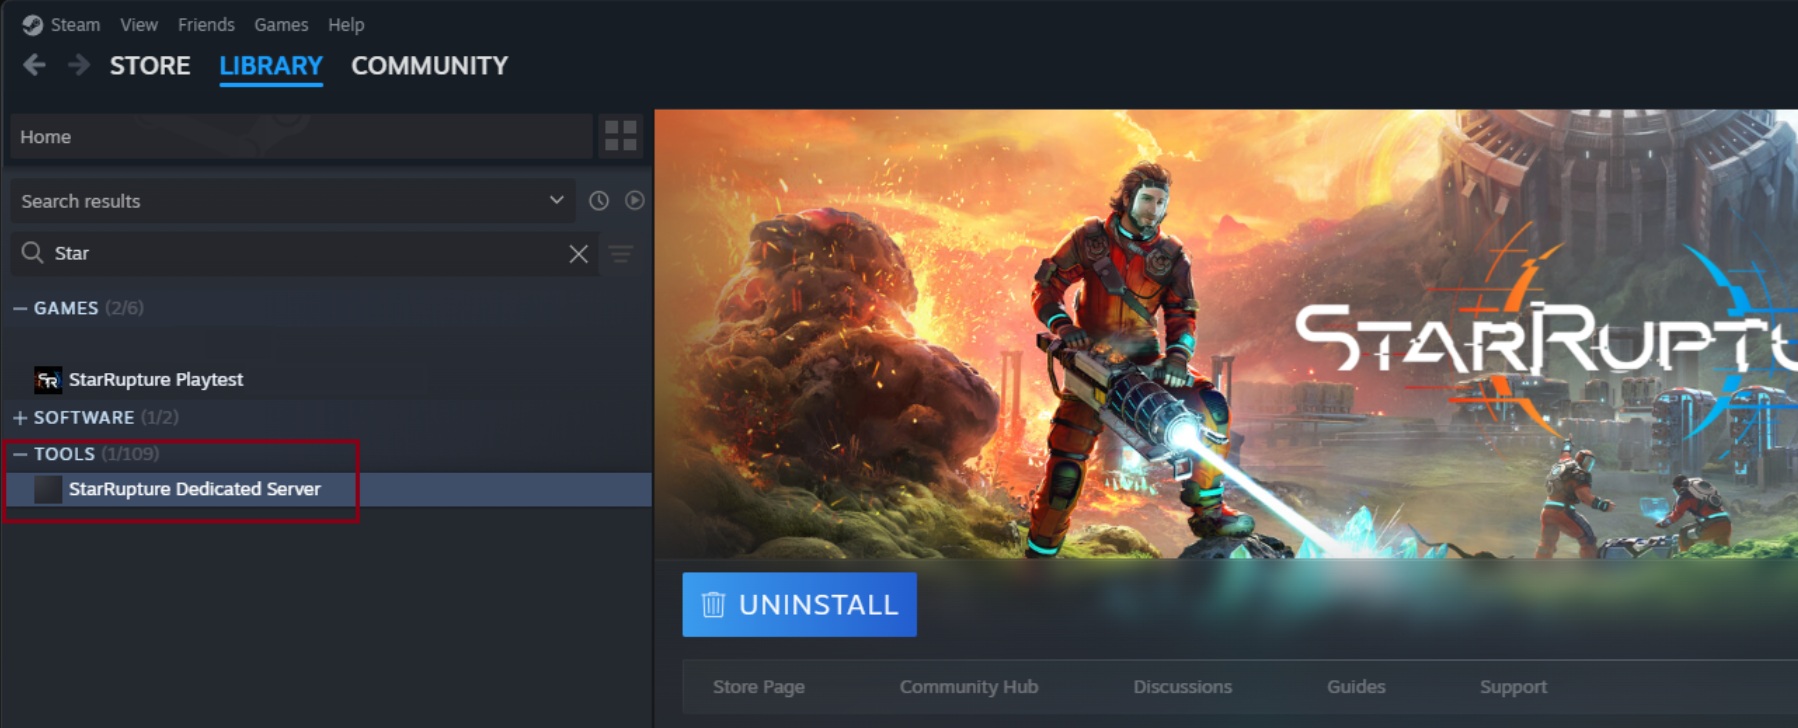
Steam App: In the Steam App, go to your Steam Library and set the search filter for both ‘Games’ and ‘Tools’. After setting the correct filter, find ‘StarRupture Dedicated Server (Experimental)’ and install the tool.
Step 2 - Finding and launching the server
Important note: Steam account limitations
- You cannot run the server tool and the game at the same time on two different PCs using the same Steam account if the server is launched from the Steam client. Steam allows only one active session per account.
It works if:
- The server is launched on the same PC as the game,
- The server is launched on a different Steam account,
- Or the server is launched without the Steam client (using the BAT file), because it does not start a Steam session.
Use the .bat method below if you want to change the server port or avoid launching the server through the Steam client:
After Installation is completed, right-click the StarRupture Dedicated Server name, select ‘Manage’ and then ‘Browse local files’.

Inside the folder, right-click SRServerWithLog.bat and choose Edit.
In the first line, paste:
start .\StarRuptureServerEOS.exe -Log -port=7777
The command-line arguments enable you to log and choose which network port the server will use.
The port number you set here (e.g., 7777) must correspond to the same port that you have opened and forwarded (see Step 3) in your router/firewall so that players can connect.
Save the changes and close the edit window.
You can now launch the dedicated server directly by running SRServerWithLog.bat.
This short .bat method is useful when you want to change the server port or run the server without using the Steam client.
After each game update, you may need to edit the SRServerWithLog.bat because the command-line arguments may reset.
SteamCMD:
Another way to install a dedicated server is to use SteamCMD. Here you can find the documentation on how to install SteamCMD on various platforms. For your own convenience, you should extract the package close to the root folder (C:\ on Windows). Run ‘steamcmd.exe’ and it will install the newest version of the tool.
Install Dedicated Server using Steam login:
Windows:
Let's assume that your folder for SteamCMD is C:\SteamCMD\ and the destination folder for server files is C:\StarRuptureDS\
Open the folder in which steamcmd.exe is located (e.g. C:\steamcmd), click on the path bar, type cmd, press Enter to open Command Prompt with that folder's path, and run the following command:
steamcmd.exe +force_install_dir C:\StarRuptureDS\ +login your_steam_login +app_update 3809400 validate +quit
You may be prompted to provide a password or a Steam Guard Code. You will also need to update your SRServerWithLog.bat. Start the server by clicking SRServerWithLog.bat.
When the server is running, the player can manage it from within the game.
Install Dedicated Server using anonymous login:
Open the folder in which steamcmd.exe is located (e.g. C:\steamcmd), click on the path bar, type cmd, press Enter to open Command Prompt with that folder's path and run the following command:
steamcmd.exe +force_install_dir C:\StarRuptureDS\ +login anonymous +app_update 3809400 validate +quit
Once the installation process is completed, the SRServerWithLog.bat file will appear in C:\StarRuptureDS folder. In order to run the server, you firstly need to edit the file (preferably with Notepad++) and provide the correct port.
Following that, it is required to either log out of Steam or close it entirely, as otherwise it will not be possible to manage the server in the game. With all steps performed correctly, start the server by double-clicking SRServerWithLog.bat and manage the server in the game by providing correct IP and port.
A known issue: after starting a server by loading a previously saved session, the player does not receive a pop-up window informing that the server was launched correctly.
Step 3 - Setting port forwarding
If your server is behind a router, you need to forward incoming connections from the external IP to the server’s internal IP and the port specified in the previous step (i.e. 7777). For more information and instructions specific to your router, visit https://portforward.com/.
Step 4 - Finding your own External IP
To find the IP address needed to connect to your server (together with the port), you can use any “what’s my IP” website — for example: https://www.whatsmyip.org/